Dockerfile
Understanding the Dockerfile is pretty easy when you think about the steps you need to follow to run your application if you were not using containers.
Let’s assume you need to run a JavaEE application on an Apache Tomcat Application Server. You would be following these steps.
- Pick an OS – Ubuntu/Windows
- Update packages – apt update
- Install dependencies- JDK
- Install Apache Tomcat
- Copy war file to the webapps directory
- Run Tomcat server – catalina.sh
So this is what Dockerfile is all about.
It basically contains instructions to start from a base OS or a base image, install all the dependencies, copy application source code/binaries to relevant locations and then specifes the entry point to the application. Then we can build an image from the Dockerfile using docker build command and run a container from that image.
Sounds pretty straightforward? Let’s try to create our own Dockerfile for our own application and see if we can get it to work.
Creating a Dockerfile for Our Own Application
For this, I am using a simple Java Spring Boot web application I have developed. The application will utilize a MySQL database and then using RESTful services, we can create a user, login and then view details of the created users. For the moment, I will only need the deployable war file to deploy on Tomcat Server. You can get it by cloning the GitHub repository.
Dockerfile for the image I want to create is pretty simple.
FROM tomcat:8

COPY ./target/mobile-app-ws.war /usr/local/tomcat/webapps/

EXPOSE 8080

CMD ["catalina.sh", "run"]- The first instruction that starts with
FROMbasically says the base image for the image I want to create is tomcat version 8. Any Dockerfile for any image you want to build for your application should start with aFROMinstruction. - The
COPYstep basically copies the deployable war file to webapps folder within the container. Keep in mind that all the paths here are relative to where the Dockerfile is. EXPOSEcommand will expose Tomcat default port as the container port.- The last line is the command to run when starting a container from the image. Here we are running the
catalina.shfile in Tomcat Server.
This file needs to be saved in File format and named as Dockerfile.
So What is the Layered Architecture?
A docker image basically consists of several layers. If you look at the Dockerfile, each instruction in the Dockerfile corresponds to a layer in the resulting image. More instructions you have in the Dockerfile, more layers in the resulting image. More layers in the image, bigger the image size and complexity.
Therefore we have to be mindful of each instruction in our Dockerfile, especially instructions like COPY or ADD that we use to include certain artefacts in our image. We have to make sure that we only include what’s necessary for our application and leave everything else behind.
If you take this application for an example, all I need for my image at the moment is the war file. Therefore all I need to copy is that. I do not need to copy my whole project directory, which would just bloat the image unnecessarily.
Each layer in our image is immutable, which means once created, cannot be changed. However, you can delete layers if necessary. Layers are cached by Docker, which means they can be reused when necessary when building other images as well.
We will run into more aspects of this Layered Architecture as our Dockerfiles get more complex and we will discuss them in future articles. For now, this much should do!
Building the Image
Next thing I am going to do is build my image using docker build command.
C:\WINDOWS\system32>docker build -t myapp "C:\Users\charith\Desktop\mobile-app-ws"
 [+] Building 10.9s (2/3)
  => [internal] load build definition from Dockerfile                                                                                                              0.1s
  => => transferring dockerfile: 155B                                                                                                                              0.0s
  => [internal] load .dockerignore                                                                                                                                 0.0s
  => => transferring context: 2B                                                                                                                                   0.0s
  => [internal] load metadata for docker.io/library/tomcat:latest                                                                                                 10.7s
This could take a few minutes and you would see something similar to above in the command line while it’s building.
Here -t flag refers to the tag of the image and myapp is the name of the image. If you go to Docker Hub and look at the tags section of any application, you would see many different images with different tags. Each tag simply refers to a different version of the image. In above command I haven’t specified a tag. If I did, it would look like docker build -t myapp:version1 "C:\Users\charith\Desktop\mobile-app-ws".
The folder path specified here is known as the build context. When you issue a docker build command, the current working directory is called the build context. By default, the Dockerfile is assumed to be located here, but you can specify a different location with a -f flag.
Regardless of where the Dockerfile is located, all recursive contents of files and directories in the current directory are sent to the Docker daemon relative to the build context. Therefore it is very important to set the build context correctly when doing a docker build. In my case, I have placed the Dockerfile in the build context.
Running Our Application Using the Image
Once the image is built, we can create a container from that, but we need to do a few things beforehand.
Next thing I am going to do is create a new network. Since I need MySQL as well for this, in order for the web server to communicate with MySQL server, they both need to be on the same network.
C:\WINDOWS\system32>docker network create myapp --driver=bridge
 4f90446164fb8273a83e6b08ba52253750bf41a50bf65dc91610d053a1717145
After that, I can create the MySQL container like this.
charith@ch MINGW64 ~
 $ docker run -d --name db-myapp \
   -e MYSQL_ROOT_PASSWORD=charith \
   -e MYSQL_DATABASE=photo_app \
   -e MYSQL_USER=charith \
   -e MYSQL_PASSWORD=charith \
   -p 53306:3306 \
   --network=myapp \
   mysql
   0b2f76b70ec82ba638eb8213a13f020db076b5617e1b69f2f02851960172e80a
Note the environment variables I have used. In my application properties I have defined the database name, username and password as above, which is why I have specified them as such here as well. You can find the application.properties file in \\mobile-app-ws\src\main\resources folder. If you want to change these, it is possible. I’ll describe that part later.
Now I can run a container using the image I created earlier.
charith@ch MINGW64 ~
 $ docker run -d --name ws-myapp \
  -p 38080:8080 \
  --network=myapp \
  myapp
We need to do one more thing before we can test our web service. If you look at the application.properties file, I have specified the database host as localhost. That is because I was developing this on my machine without containers so my database and the web server were on the same machine. Since we are using Docker now, database is essentially on another machine. Therefore we need to specify the name of the container of our MySQL database as the database host in the properties file.
To do that, first I need to open a shell inside my web app container.
C:\WINDOWS\system32>docker exec -it ws-myapp sh
 #
Sine we are going to edit the properties file, we need to use vim. To use vim, first we need to install it on the container. it can be done by running apt update and then apt install vim commands.
Once done, I need to go to the directory where the properties file is located.
# cd webapps/mobile-app-ws/WEB-INF/classesYou can do an ls here to confirm the application.properties file is present.
To edit the properties file, you can follow these steps.
- Run
vim application.propertiesto open the file with vim. - Press
ito go to insert mode to edit the file. - Bring the cursor to the following line in the file:
spring.datasource.url=jdbc:mysql://localhost:3306/photo_app
- Change
localhostintodb-myapp. - Make sure everything is correct and pres
Esckey to exit insert mode. - Type in
:wqto save changes and exit vim editor. If you need to exit without saving in case you made a mistake, you can type in:q.
Once this is done, we need to restart our ws-myapp container for the change to take effect. You can use docker stop ws-myapp and docker start ws-myapp commands to do that.
Testing the Web Service
Now that everything’s configured properly, we can test our web service!
Creating a New User
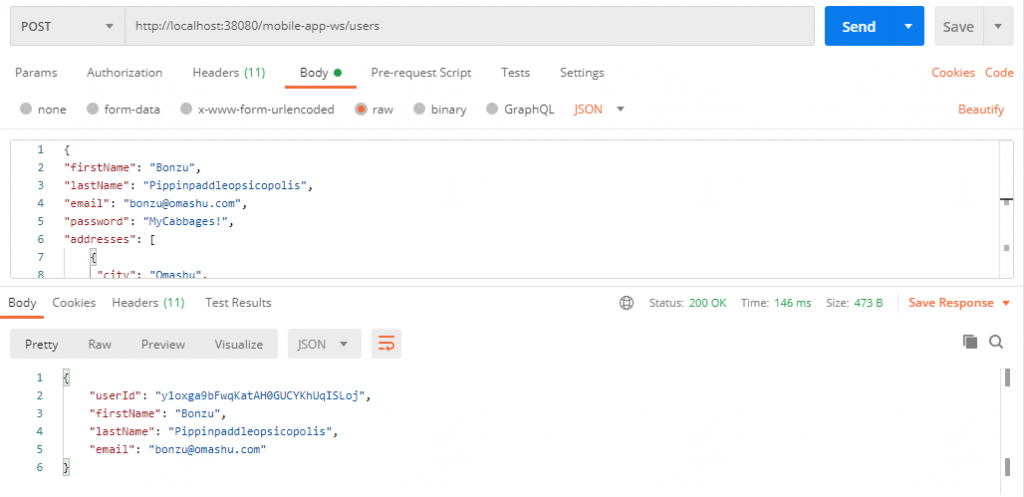
To create a user, I am sending a POST request to http://localhost:38080/mobile-app-ws/users.
The body should be something similar to below.
{
"firstName": "Bonzu",
"lastName": "Pippinpaddleopsicopolis",
"email": "bonzu@omashu.com",
"password": "MyCabbages!",
"addresses": [
    {
     "city": "Omashu",
     "country": "Earth Kingdom",
     "streetName": "Serpent's Pass",
     "postalCode": "119",
     "type": "shipping"
    },
    {
     "city": "Omashu",
     "country": "Earth Kingdom",
     "streetName": "Serpent's Pass",
     "postalCode": "119",
     "type": "billing"
    }]
}
Request headers should be as below.
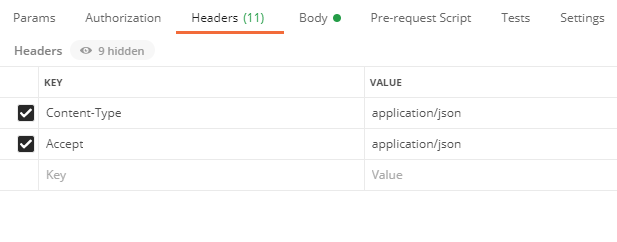
The result would be similar to this.
Login as the Newly Created User
To login, I am sending a GET request to http://localhost:38080/mobile-app-ws/users/login. We need to send the email and the password in the body of the request. The result would look like this.
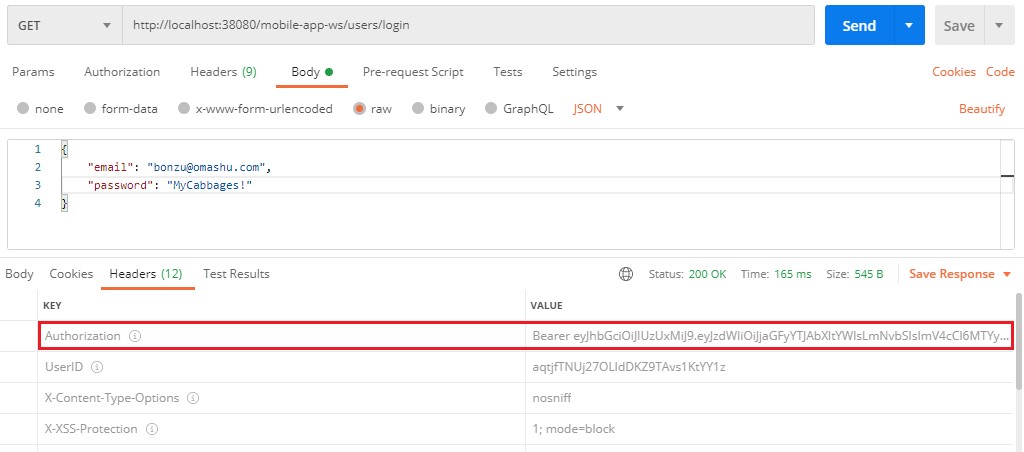
Notice the Authorization header in the response. We need this token to send any other requests because all the other end points are protected.
Get All Created Users
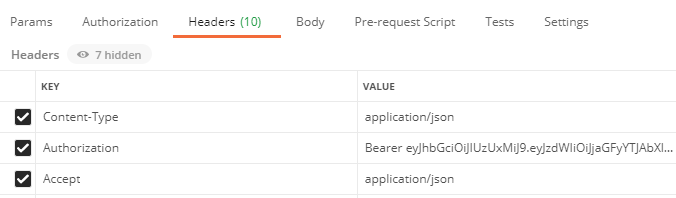
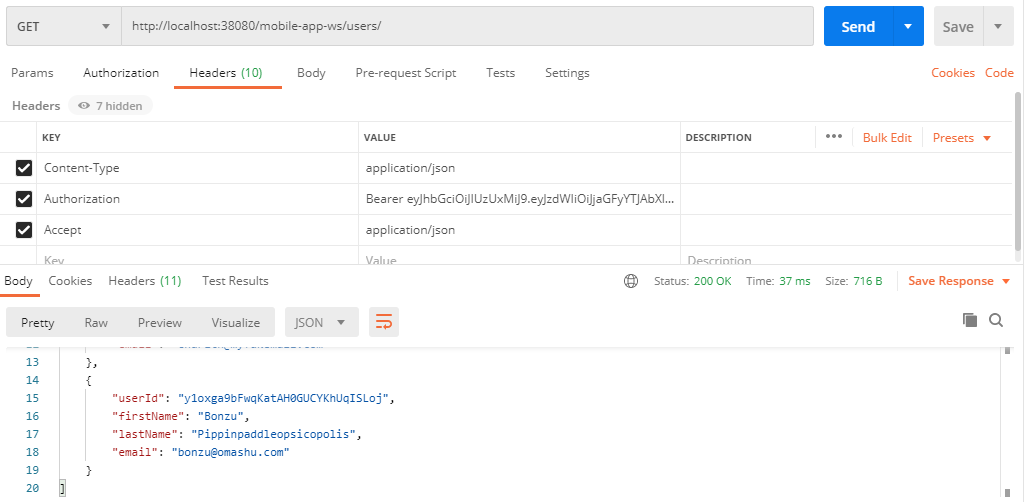
To login, I am sending a GET request to http://localhost:38080/mobile-app-ws/users. You need to add a new request header named Authorization and add the Bearer token retrieved from the previous step as the value.
Response would fetch all the users in the database as a JSON array.
Looks like the application is working as expected, which is good! However we had to go into the container and change our application.properties file to update datasource properties. So things are just 3.6 Roentgen at the moment(not great, not terrible! >:) ).
We can improve our setup for the better with a multi-stage build and using some Environment Variables. I am going to go into more details in the next articles. If you are interested, first you can read Dockerfile: Multi-stage Build and then Dockerfile: Environment Variables.