

In this article of the Jenkins series, we will see what a Jenkins Shared Library is and how we can use a Shared Library to make our life easy when it comes to CI/CD!
What is a Jenkins Shared Library?
If you have followed the previous articles in this Jenkins series to this one, you may have realized that we pretty much repeated the same code in all of our pipelines. Suppose we have a microservices application. Then all of them would share most of the logic such as building a jar file, pushing a Docker image to a registry etc.
Now if we have learnt anything while programming, a golden principal we try to adhere to is not to repeat ourselves (famously known as DRY principle) whenever possible. Therefore it does not make sense to write the same code over and over again. Imagine the horror if you had to make a small change in all the 100 places where you have used the exact same code! That’s not a good use of our valuable time, when there is a way to avoid it.
This is where shared libraries come in. With a Shared Library, we can share common functions across pipelines, which makes it easier to maintain our projects. A shared library is basically it’s own code repository consisting of Groovy scripts containing functions that can be used as variables in our Jenkinsfiles.
Structure of a Jenkins Shared Library
#root
├───src
│   └───xyz
│       └───charith
│               Docker.groovy
│
├───vars
│       buildDockerImage.groovy
│       buildWar.groovy
│
├───resources
│   └───xyz
│       └───charith
Structure of a shared library project is pretty simple.
varsdirectory – contains all the scripts that we use as global variables in pipelines.
Each variable has it’s own Groovy file invarsdirectory. For instance, in above example, there are two variables namedbuildDockerImageandbuildWar. Although we call these variables, what’s inside these scripts are one or more functions. We’ll talk about that in detail later.srcdirectory – structured like the source folder of a normal Java project. Any helper scripts for the variables in vars folder go in here.resourcesdirectory – used to load non-Groovy files.
Now that we have a basic understanding, we can start writing our library.
Write the Shared Library
Create Groovy Project
For our Shared Library project, we are going to use IntelliJ IDE.
- From IntelliJ, create new Groovy project.
- Create
varsdirectory in the project root directory. srcdirectory would already be there. You don’t need to create a package insidesrcjust yet, as we won’t be doing anything with it at this time.- No need to create the
resourcesdirectory either for the same reason as above. - Inside
varsdirectory, create two Groovy scripts namedbuildDockerImage.groovyandbuildWar.groovy.
In one of the previous articles, we wrote ourJenkinsfilewithout using a shared library, and there, we wrote the code forbuildDockerImageandbuildWarinside theJenkinsfile. Here, what we are going to do is move that code into these scripts. First have a look at thatJenkinsfilehere to get a better understanding. The code should be inside “Build and package war file” and “Build Docker image” stages.
Script to Build WAR File
#!/usr/bin/env groovy

def call(){
    echo "Packaging war file..."
    sh "mvn clean package -Dmaven.test.skip=true"
}
We have just moved what was inside the script block into a function named call in this Groovy file. That’s all we have done. The shebang line at the top merely specifies which program should be called to run the script. It will help programs identify the script as a groovy script.
Script to build Docker Image
#!/usr/bin/env groovy

def call(String imageName){
    echo "Building Docker image..."
    withCredentials([usernamePassword(credentialsId: "dockerhub-credentials", usernameVariable: "username", passwordVariable: "password")]){
        sh "docker build -t $imageName ."
        sh "echo $password | docker login -u $username --password-stdin"
        sh "docker push $imageName"
    }
}
Again, like with buildWar script, we have just moved what was inside the script block into a function named call in this Groovy file.
But this time, you may have noticed that I have specified an argument in the call function for the image name. Since the idea is to use the shared library in multiple projects, we cannot have the image name hard coded in the function. Therefore, what we do is pass it as an argument.
Note that since the imageName argument is used inside double quotes, it is referenced as $imageName inside sh commands.
Now that the scripts are written, we need to edit the Jenkinsfile to utilize these two scripts as variables.
Updated Jenkinsfile
@Library("jenkins-shared-library")_

pipeline {
    agent any
    tools{
        maven "maven-3.8"
    }

    stages {
        stage('Build and package war file') {
            steps {
                script{
                    buildWar()
                }
            }
        }
        stage('Build Docker image'){
            steps{
                script{
                    buildDockerImage("dcharith/mobile-app-ws:2.0")
                }
            }
        }
       ...
       ...
    }
}
Notice that in the first line, I have imported the shared library to my Jenkinsfile. I have specified the name of the repository here.
And inside the script blocks, I have called the two variables I defined in my shared library as appropriate. Notice I have passed the name of my Docker Image as an argument to buildDockerImage.
Once this is all done, there is one last thing we need to do from Jenkins UI to make our shared library available from Jenkins.
Configure the Shared Library from Jenkins
From Jenkins dashboard, go to “Manage Jenkins -> Configure System”.
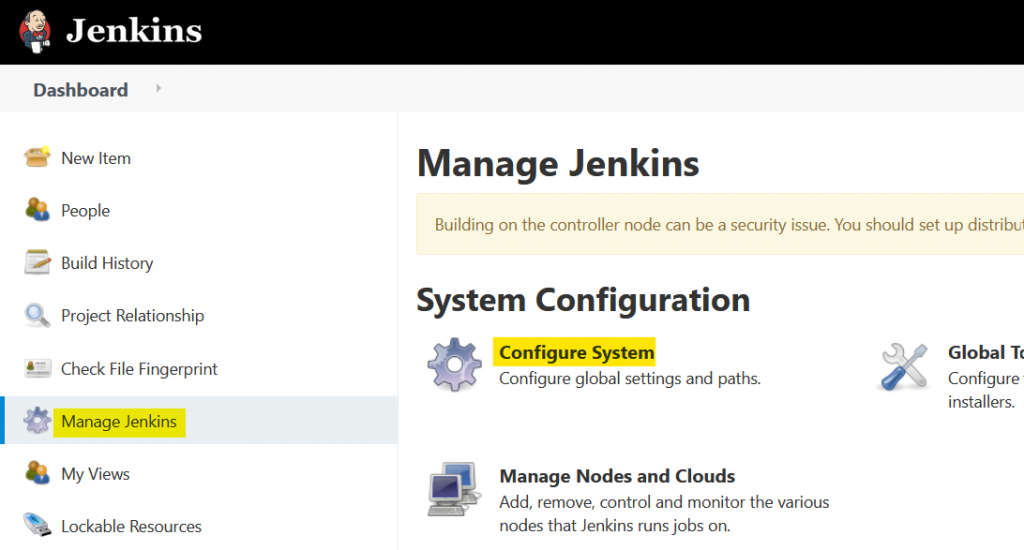
Scroll down to “Global Pipeline Libraries” section and click “Add”.

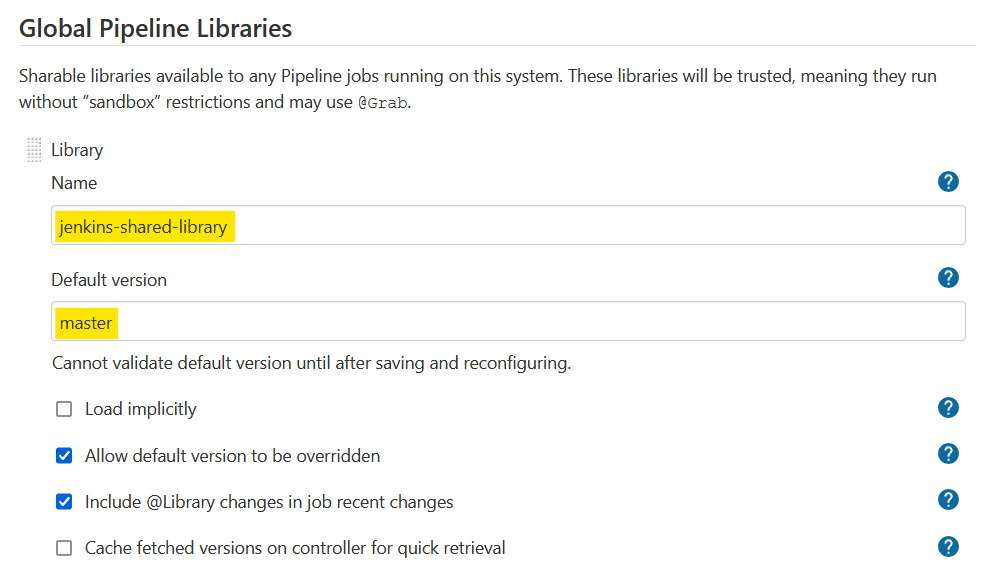
Fill in details for the shared library as below. The name you define here has to be the one you gave inside the @Library annotation in the Jenkinsfile. Default version defines which branch of the shared library should be used.
Next we should give the Git repository of our shared library and the credentials to that repository as below.
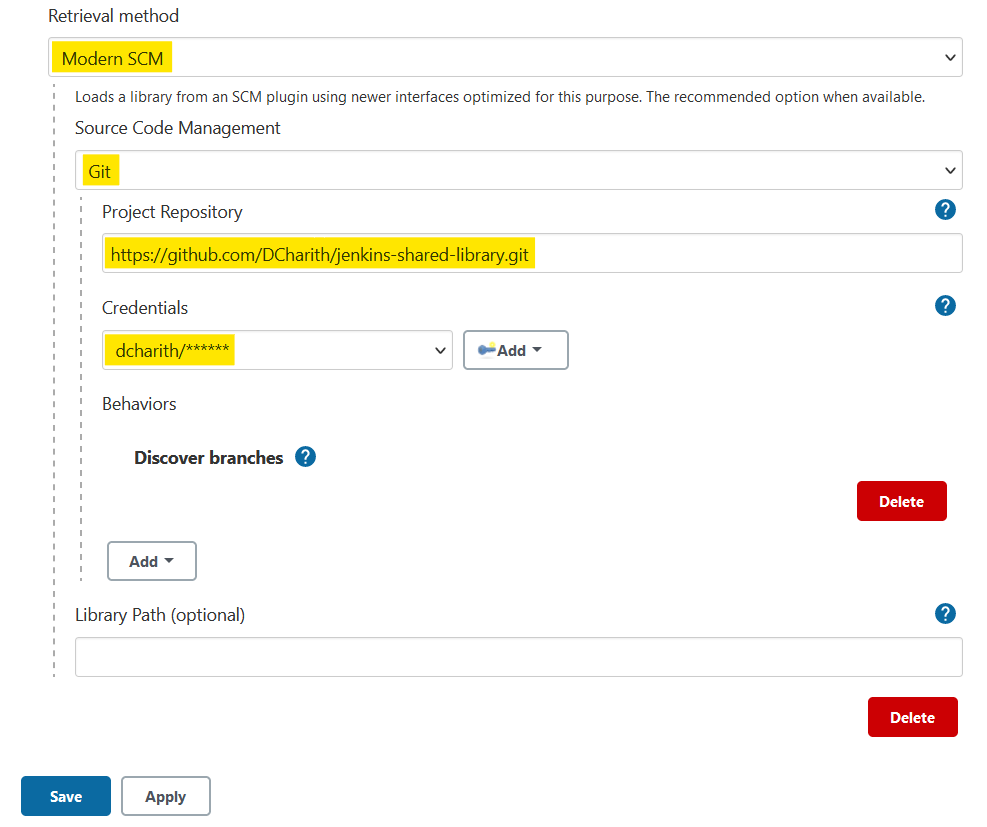
Once all the details are filled, click Save. Now all that’s left to do is run a build and see if our shared library worked!
Testing Our Library
In the previous article, we created a multibranch pipeline that would build all the branches in our project repository. To work with the shared library, I created a new branch named feature/jenkins-sl in my GitHub repository. Now if I scan the multibranch pipeline, it would identify the new branch and build it!
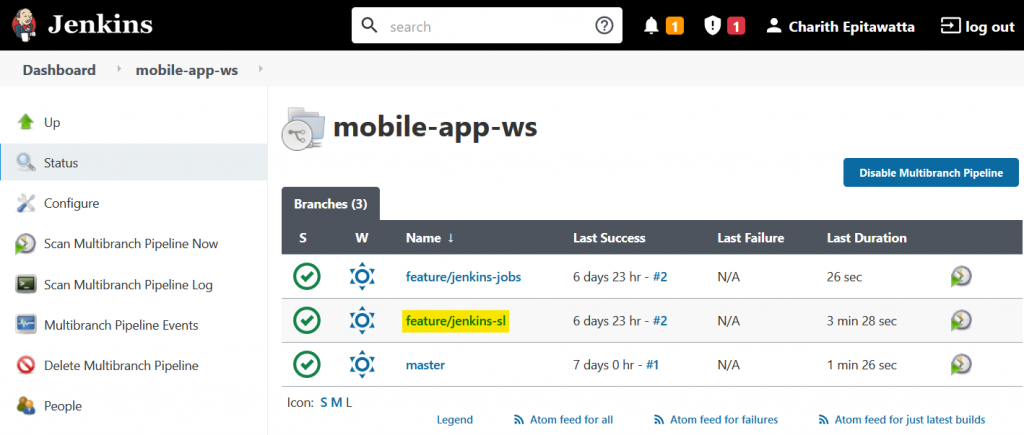
As you can see the branch has been built successfully!