In the previous article of this series, we created a simple freestyle job that would package a simple Maven Project. In this article, we are going to build a docker image with a Jenkins freestyle job for our project and push it to Docker Hub.
Okay, as you might already be aware, to build a Docker image, we need to run docker build command. Which means, we need to have the Docker CLI available within our Jenkins container.
We have discussed the methods of running docker inside Docker in an article in Docker series. And we are going to use the method of mounting the Unix socket.
Step 1: Give Jenkins Container Access to Docker
We already have a Jenkins container running, so the first thing we have to do is stop the running container and remove it. This has no consequences on our data as we have a named volume that would protect all our data. Then we can run a new Jenkins container using the following Docker command.
docker run -d --name jenkins \
-p 8080:8080 \
-p 50000:50000 \
-v jenkins_home:/var/jenkins_home \
-v /var/run/docker.sock:/var/run/docker.sock \
-v $(which docker):/usr/bin/docker \
jenkins/jenkins:lts-jdk11- Line 1, 2, 3 and 7 are no different from how we started the container earlier.
- Line 4 – Just make sure you use the same named volume for Jenkins home so that all your previous data would still be available to you.
- Line 5 – Here we are giving the Jenkins container access to the Unix socket that runs Docker using a bind mount.
- Line 6 – Here we are giving the Jenkins container access to the Docker executable using a bind mount.
If you are not familiar with Docker storage methods such as bind mounts and named volumes, I would suggest having a look at the article Docker Storage.
Once the container is running, there is one last thing to do. That is to give read/write access for the Docker socket to the Jenkins user inside the Jenkins container.
To view permissions we can run below command
# ls -l /var/run/docker.sock
srw-rw---- 1 root 119 0 Sep 30 06:29 /var/run/docker.sock
#
As you can see the owner and the group both has read/write permissions, so we just need to give the same permission to others as well. Run chmod command as below to give access and then run the ls -l command again to double check.
# chmod o+rw /var/run/docker.sock
# ls -l /var/run/docker.sock
srw-rw-rw- 1 root 119 0 Sep 30 06:29 /var/run/docker.sock
#
To further verify that you can run docker commands from within the container, just open a terminal inside the container and run a simple command such as docker ps.
jenkins@ubuntu-jenkins:~$ docker exec -it jenkins sh
$ docker ps
CONTAINER ID   IMAGE                       COMMAND                  CREATED          STATUS          PORTS                                                                                      NAMES
b011185e26d0   jenkins/jenkins:lts-jdk11   "/sbin/tini -- /usr/…"   48 minutes ago   Up 48 minutes   0.0.0.0:8080->8080/tcp, :::8080->8080/tcp, 0.0.0.0:50000->50000/tcp, :::50000->50000/tcp   jenkins
$
And we should be able to see our running Jenkins container as above.
Okay now that is over with, we can go back to the Jenkins UI.
Step 2: Add Docker Hub Credentials to Jenkins
- From Jenkins home page, navigate to Manage Jenkins -> Manage Credentials.
- Click on the link named “Jenkins” under “Stores scoped to Jenkins” section.
- Click on “Global credentials (unrestricted)”.
- Click on “Add Credentials” from the menu on left side column, which would bring you to following page.
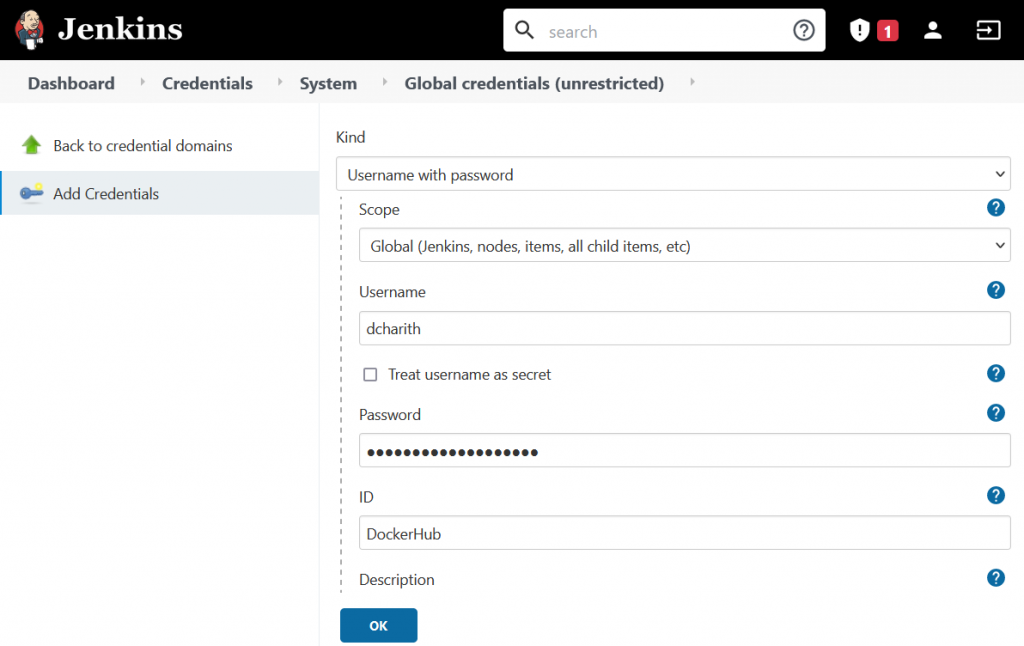
- Enter correct credentials to your Docker Hub account as above and press OK.
Once this is done, we can go back to configuring our Jenkins job to add these credentials to our job.
Step 3: Add Docker Hub Credentials to the Job
- From the Jenkins Home page, click on your freestyle job.
- From left hand side menu, select “Configure”.
- Scroll down to the “Build Environment” section of your job configuration.
- Check “Use secret text(s) or file(s)”, which will open a new section named “Bindings as below”.
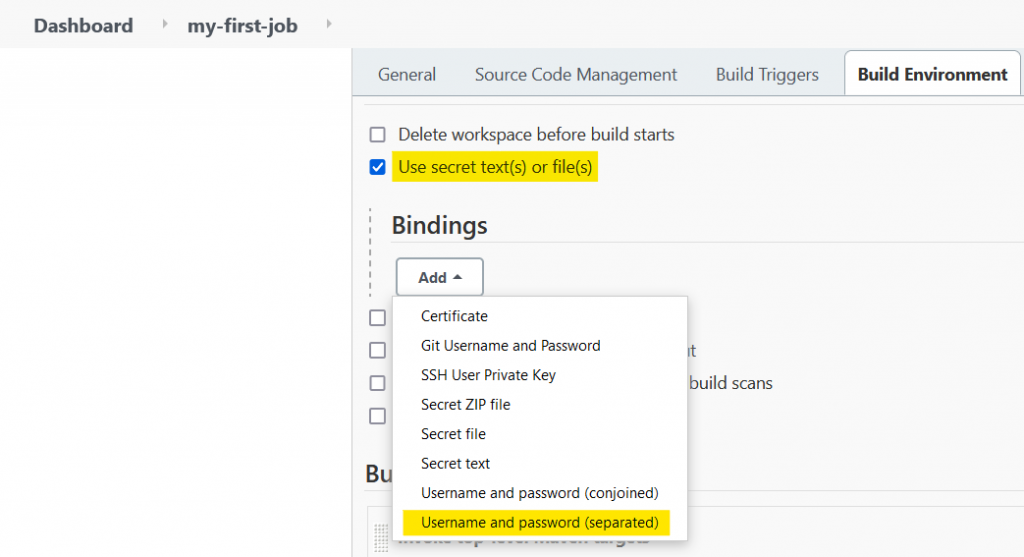
- From the “Add” drop down, select “Username and password (separated)” as above.
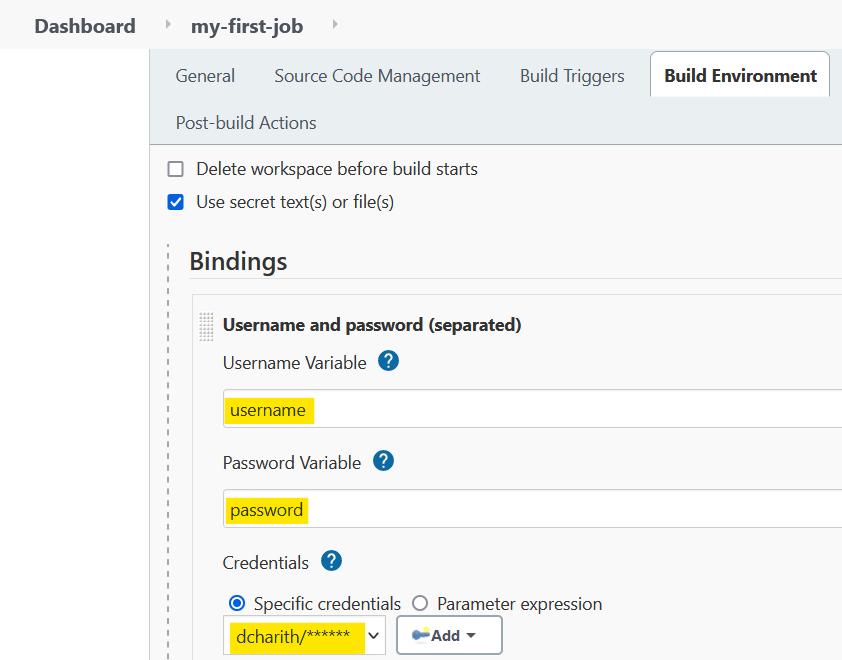
- Enter the variable names and select the correct credentials for the Docker Hub account as below.
Next we can scroll down to the build section of the job and add a new build step.
Step 4: Add Build Step to the Job
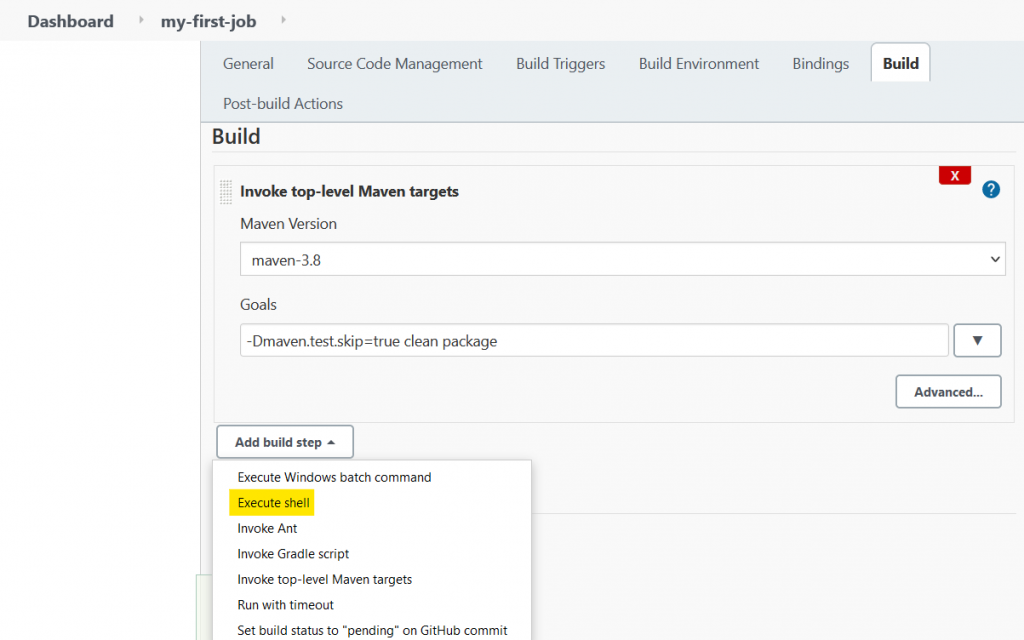
- Scroll down to the build section of the job and select “Execute shell” from “Add build step” drop down as below.
- Now add the code to build the image and push it to Docker Hub as below.
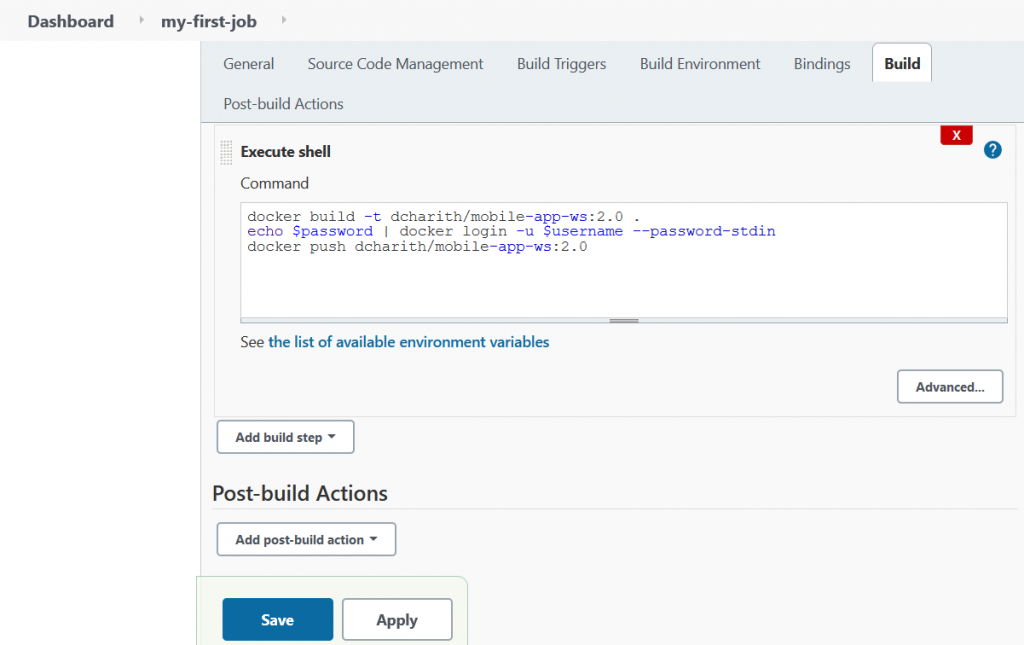
docker build -t dcharith/mobile-app-ws:2.0 .
echo $password | docker login -u $username --password-stdin
docker push dcharith/mobile-app-ws:2.0- This Docker build command is correct in relation to the project I am using. If you are using a different project, make sure to specify the correct build context and the image name and tag here.
- Notice that I have used the
usernameandpasswordvariables I defined in step 3 fordocker loginin line #2. - And I already have a repository named
mobile-app-wscreated in Docker Hub to be able to push this image.
- Now click on save and we are ready to run the job!
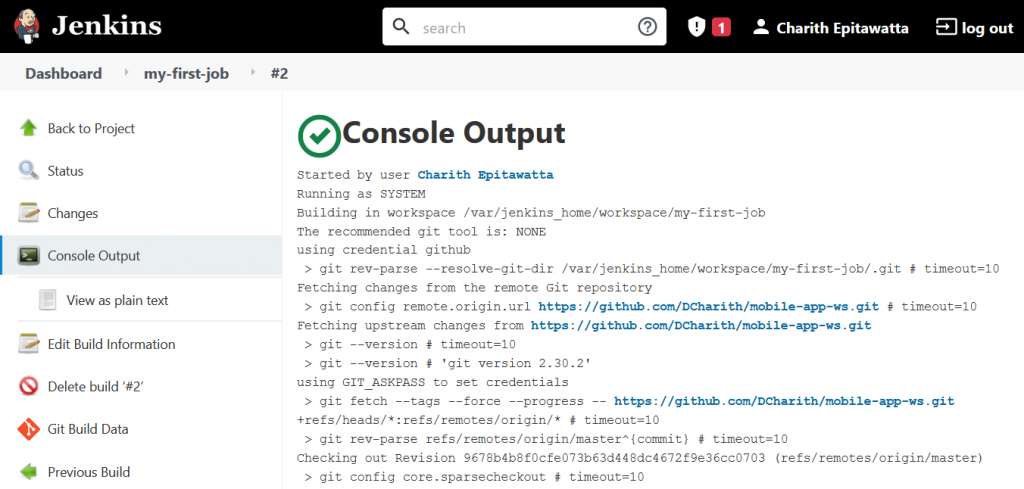
As you can see below, the job has run successfully.
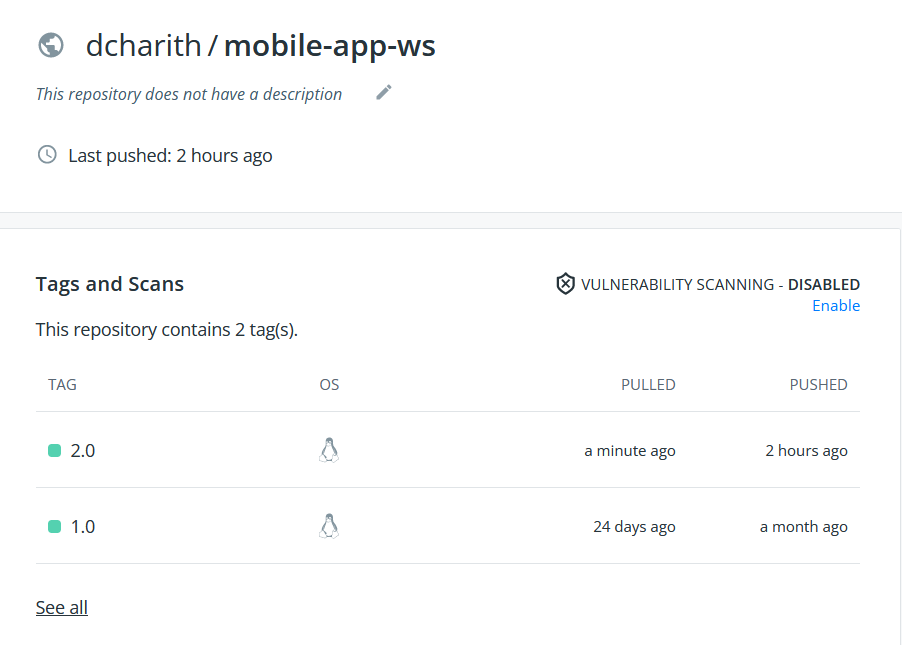
And in Docker Hub, I can see the image I just pushed.
