
If you look at the predefined repositories in your Nexus installation, you would see the following.
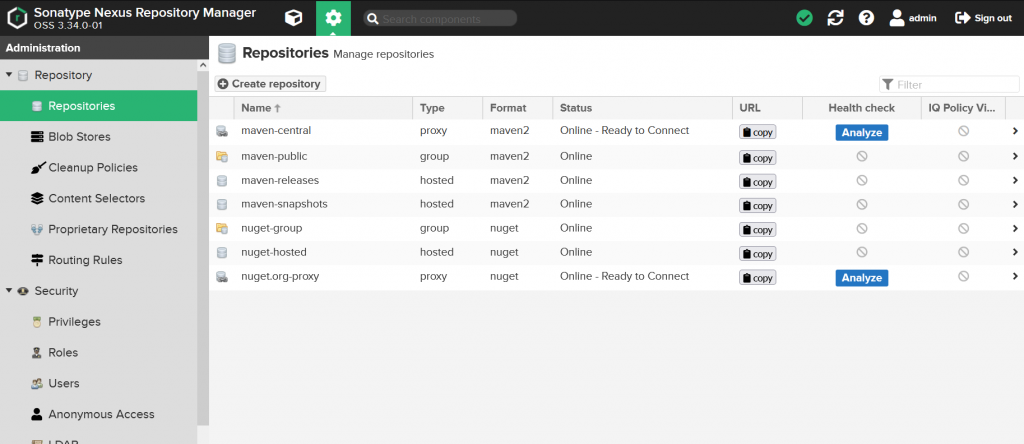
Here notice the 4 Maven repositories.
| Name | Type | Purpose |
|---|---|---|
| maven-central | proxy | This points to the Maven public repository where we normally retrieve artifacts from. Instead of directly pulling artifacts from there, you can setup a proxy repository like this. Next time you download the same dependency, it will be retrieved from Nexus cache instead of going to Maven public repository. |
| maven-snapshot | hosted | All artifacts belonging to your projects’ development versions would go here. |
| maven-releases | hosted | All artifacts belonging to your projects actual releases would go here. |
| maven-public | group | This is a repository that groups all of the above together. It will provide you a single URL to configure your clients to download from. This would be the focus of this article. |
If you go to the settings view by clicking on the cogwheel icon at the top of Nexus, then click on repositories from the navigator on left, and have a look at maven-central repository, you would see that it consists of all the members listed above.

We would be adding maven-public as a mirror to our Maven project so that when we retrieve artifacts, whether it is Maven public artifacts or artifacts of our project, they will be retrieved from Nexus.
First step would be updating the pom.xml
</project>
...
     <repositories>
		<repository>
			<id>maven-public</id>
			<url>http://165.232.178.38:8081/repository/maven-public/</url>
		</repository>
	</repositories>
...
</project>
Note that this goes inside repositories tag, unlike when we were updating the pom for pushing artifacts to Nexus in the previous article.
The id tag is a reference to identify the repository, which would be useful later. The url tag is to specify the URL of the repository. You can find the URL of each repository from the Nexus GUI.
Next you need to update the maven settings.xml file located in conf directory where you have installed Maven. It is usually a directory like C:\Program Files\apache-maven-3.8.2\conf.
  <servers>
	<server>
      <id>maven-public</id>
      <username>admin</username>
      <password>MyAwesomeP@$$word1</password>
    </server>
    ...
  </servers>
You should find the servers tag in settings.xml file and should add details of maven-public repository as above. Here the id tag refers to the id we specified in POM.xml file. Username and password are the credentials of a user that has privileges to upload to these repositories.
Lastly, we need to add one last thing to the settings.xml file as below.
  <mirrors>
    <mirror>
      <id>maven-public</id>
      <mirrorOf>*</mirrorOf>
      <name>Group repo for all maven dependencies</name>
      <url>http://165.232.178.38:8081/repository/maven-public/</url>
    </mirror>
    ...
  </mirrors>
Once this is done, you can do an mvn package from the project directory to see the outcome.
C:\Users\Charith\Documents\STS-Workspace\mobile-app-ws>mvn clean -Dmaven.test.skip=true package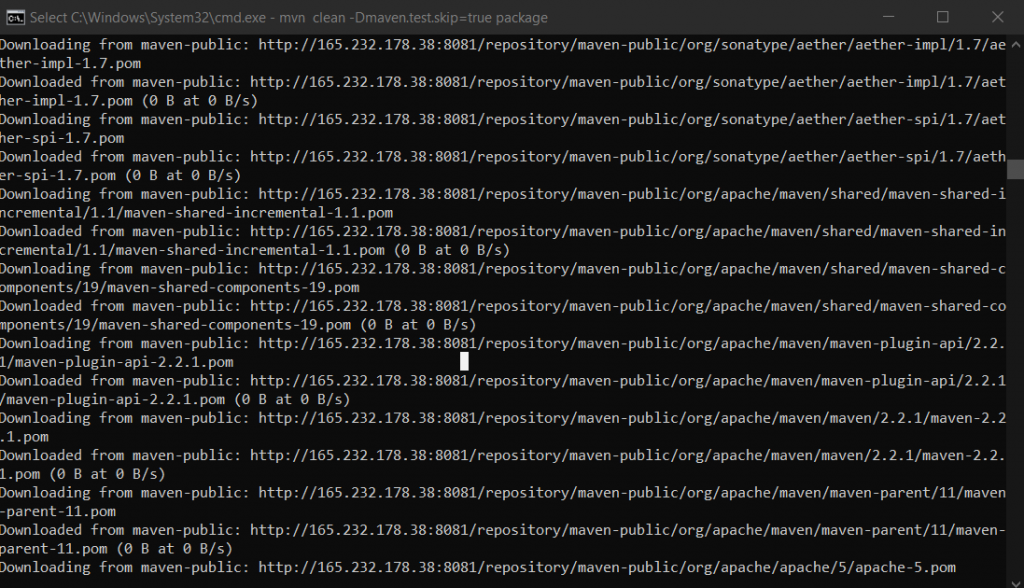
Notice in above screenshot that the dependencies are being downloaded from Nexus instead of directly from Maven. This means our setup was a success!
Once this is completed, from Nexus GUI, browse maven-public repository.
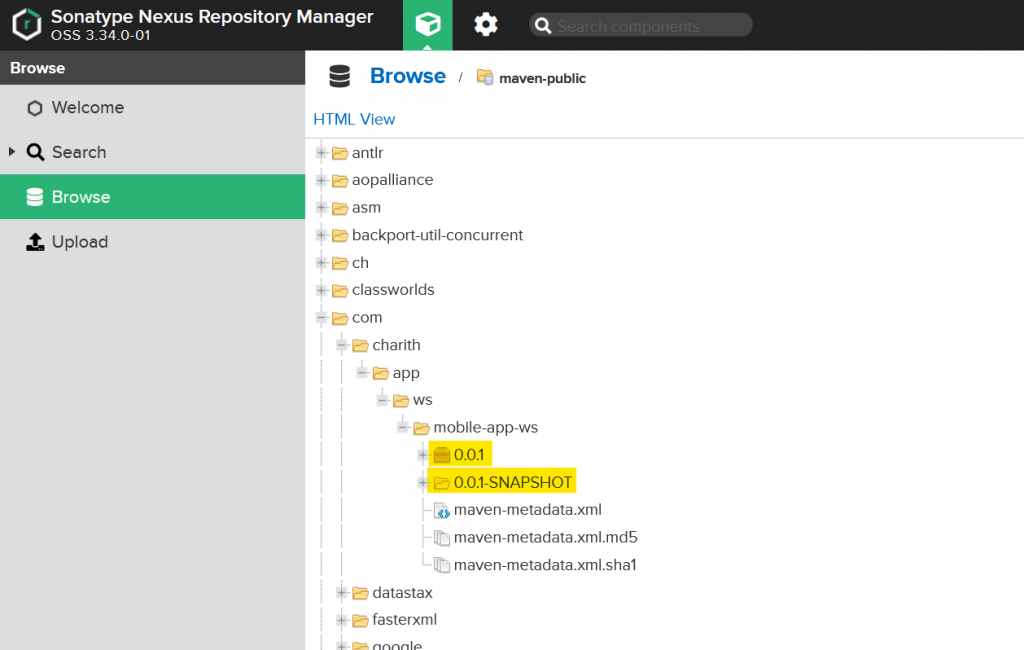
You can see that all the dependencies are now available in maven-public repository including the artifacts we deployed to snapshot and releases repositories for our own app.