
In the previous article, we installed Nexus. If you had looked around the GUI, you may have noticed that by default, there are some pre-configured repositories in Nexus. And you would see four of them for Maven as show in below picture.
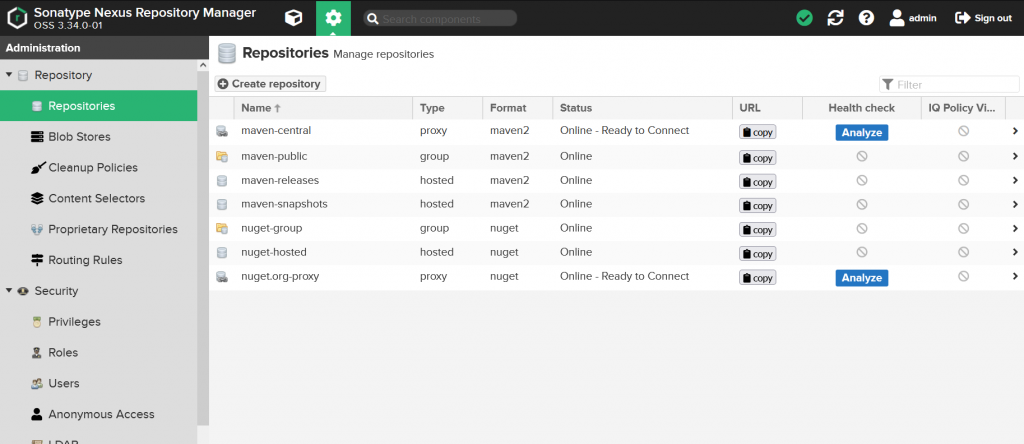
Here, maven-central is a proxy repository for Maven’s public repository so that you can pull artifacts from there. maven-releases and maven-snapshots are the repositories you can use for your stable release artifacts and development stage artifacts respectively. These are the repositories you publish your project artifacts to.
We look into maven-public repository in detail in the next article of this series Retrieve Maven Artifacts from Nexus.
Whether you want to upload to a snapshot or release repository, first of all, you need to add the Maven build plugin to your POM.xml file. And it can usually go inside the build tag.
    <project>
      ...
      <build>
        <!-- To define the plugin version in your parent POM -->
        <pluginManagement>
          <plugins>
            <plugin>
              <groupId>org.apache.maven.plugins</groupId>
              <artifactId>maven-deploy-plugin</artifactId>
              <version>3.0.0-M1</version>
            </plugin>
            ...
          </plugins>
        </pluginManagement>
        <!-- To use the plugin goals in your POM or parent POM -->
        <plugins>
          <plugin>
            <groupId>org.apache.maven.plugins</groupId>
            <artifactId>maven-deploy-plugin</artifactId>
            <version>3.0.0-M1</version>
          </plugin>
          ...
        </plugins>
      </build>
      ...
    </project>
Note that I have specified the version as 3.0.0-M1 here, which is the latest version at the time of writing this. You can find the latest stable version easily from MvnRepository.
If your project is a Maven Spring-Boot project then, the following plugin is probably already added, in which case you would see a warning mentioning that another version of the plugin exists in the project. If that is the case, then you can skip the above step.
    <build>
        <plugins>
            <plugin>
                <groupId>org.springframework.boot</groupId>
                <artifactId>spring-boot-maven-plugin</artifactId>
            </plugin>
        </plugins>
    </build>
Once this is done, finally you need to add following as well to the POM.xml.
<project>
    ...
	<!-- Support for Nexus release and snapshot repositories -->
	<distributionManagement>
		<snapshotRepository>
			<id>nexus-snapshots</id>
			<url>http://165.232.178.38:8081/repository/maven-snapshots</url>
		</snapshotRepository>
		<repository>
			<id>nexus-releases</id>
			<url>http://165.232.178.38:8081/repository/maven-releases</url>
		</repository>
	</distributionManagement>
    ...
</project>
Here inside snapshotRepository tag is where we specify details of our snapshot repository. Inside the repository tag, we can specify the details for our release repository.
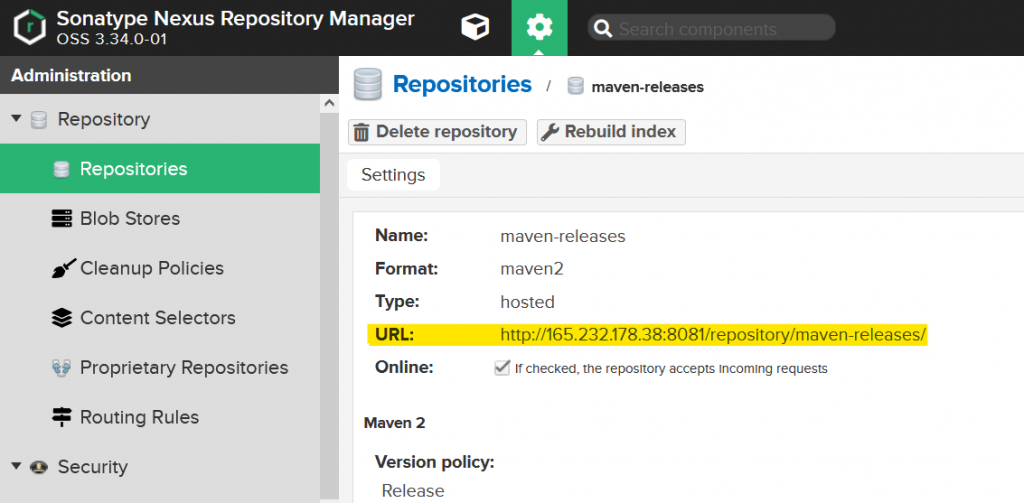
The id tag is a reference to identify the repository, which would be useful later. The url tag is to specify the URL of the repository. You can find the URL of each repository from the Nexus GUI.
Now add following to the maven settings.xml file located in conf directory where you have installed Maven. It is usually a directory like C:\Program Files\apache-maven-3.8.2\conf.
  <servers>
	<server>
      <id>nexus-snapshots</id>
      <username>admin</username>
      <password>MyAwesomeP@$$word1</password>
    </server>
	<server>
      <id>nexus-releases</id>
      <username>admin</username>
      <password>MyAwesomeP@$$word1</password>
    </server>
    ...
  </servers>
You should find the servers tag in this file and should add the snapshot and release repository details as above. Here the id tag refers to the id we specified in POM.xml file. Username and password are the credentials of a user that has privileges to upload to these repositories.
In order to deploy project components with the above setup, you need to invoke a build with mvn clean deploy. First let’s package our war file.
C:\Users\Charith\Documents\STS-Workspace\mobile-app-ws>mvn -Dmaven.test.skip=true clean packageWe should run this command from the project root directory.
If this successfully completes, you can deploy to the remote repository.
C:\Users\Charith\Documents\STS-Workspace\mobile-app-ws>mvn -Dmaven.test.skip=true deployThis will take a while to upload the artifact to the remote repository. You would see the upload progress like below.
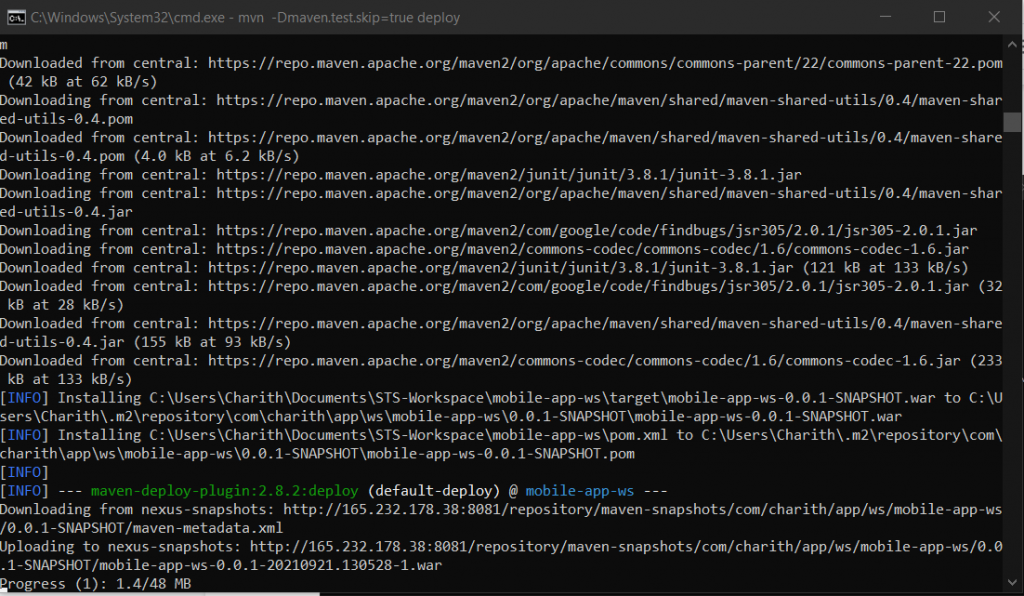
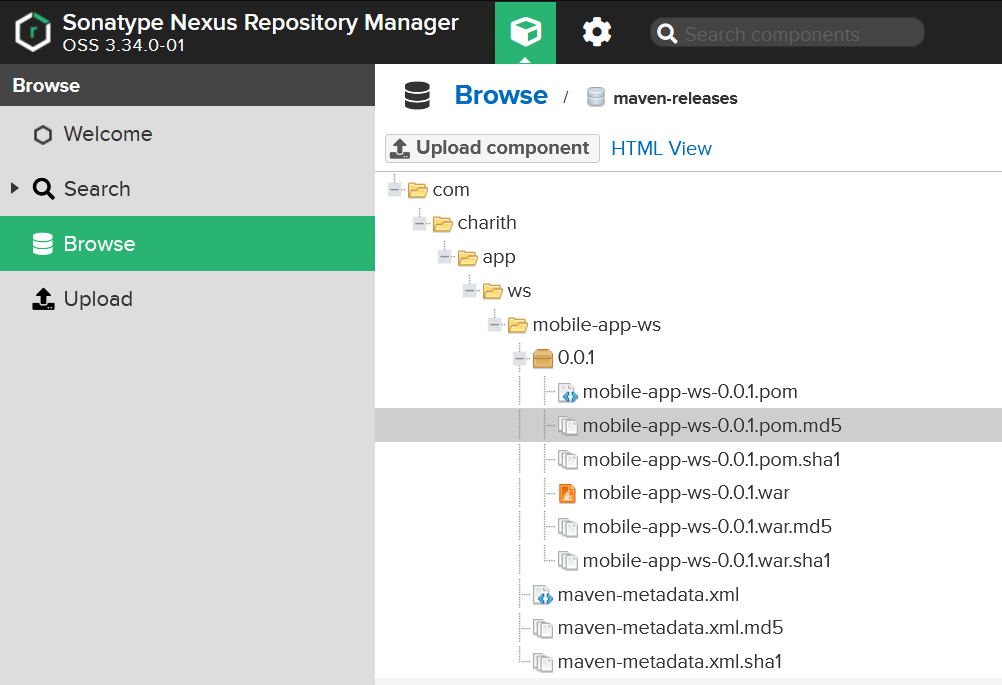
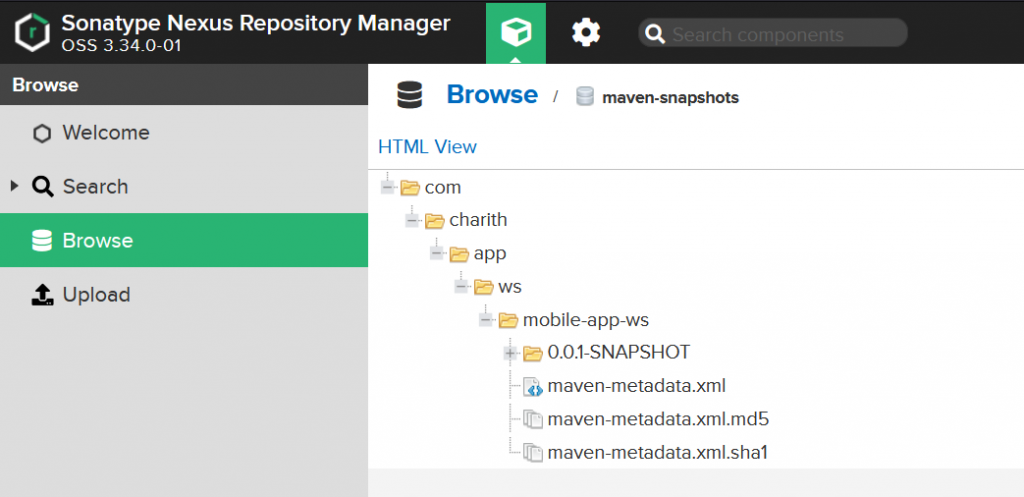
Once you get the build success message in the command line, you can login to Nexus and see your artifact under Maven snapshot repository.
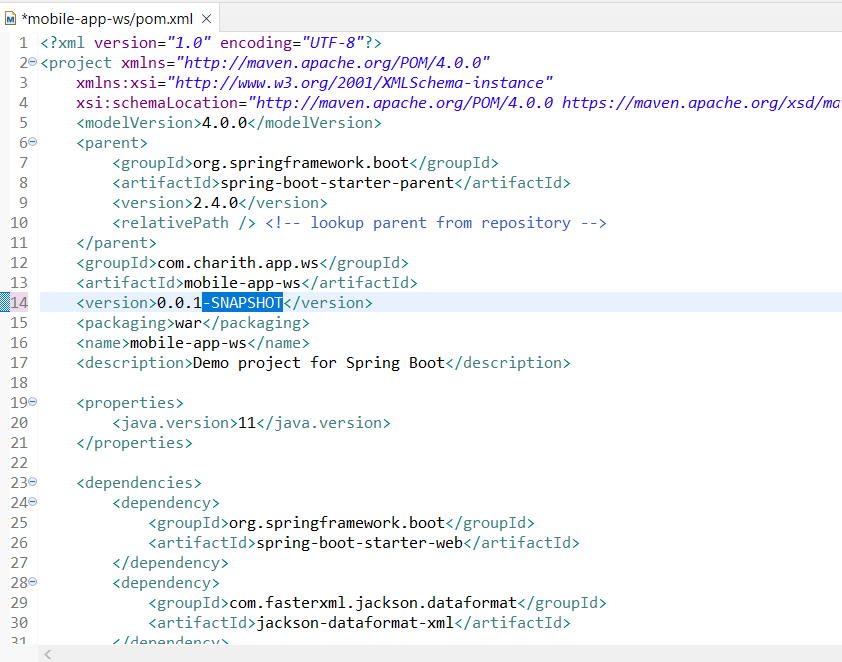
Now if you want to upload to the release repository, all you have to do is delete the -SNAPSHOT part inside the version tag of POM.xml.
If you do a mvn depoly with this deleted, the artifact will be uploaded to release repository.